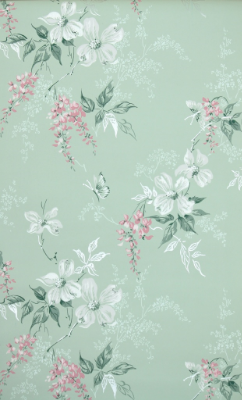
How to Hang Vintage Wallpaper
HOW TO HANG VINTAGE WALLPAPER

What You Will Need
The Main 5:
|| vintage wallpaper
|| wheat paste (we recommend Golden Harvest brand, find it online)
|| paste brush (plus optional small paint roller for applying wall size)
|| wallpaper smoothing brush
|| seam roller
You can find "wallpapering kits" online that include a paste brush, smoothing brush, and seam roller, or you can find these items individually. In lieu of a smoothing brush, you may use a soft sponge.
Supporting tools:
|| 6 ft. work table
|| 6 ft. straight edge
|| plumb bob and chalk line or laser level
|| rotary cutter and cutting surface
|| 2 ft. ruler
|| ladder
|| sharp scissors
|| buckets for water, size, and paste; drop clothes; soft rags and sponges for cleaning
Hanging Your Vintage Wallpaper
(Make sure walls are clean and properly prepped before proceeding.)
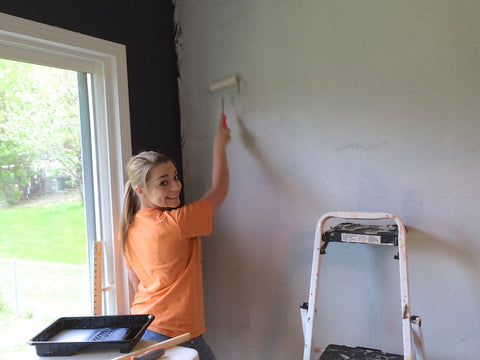
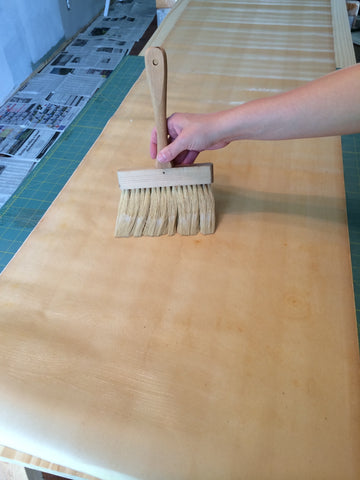
1.) Size your Walls
Sizing is a fancy name for a rather simple process. The traditional wheat paste that you need for hanging vintage wallpaper is actually called
"wheat paste/wall size." The difference between the "paste" you apply to the paper and the "size" you apply to the wall is the consistency. The size is a much thinner, more watery variation of the paste you will make for hanging the paper.
Follow the instructions for making wall size on the back your wheat paste container. You'll want to prepare the size ahead of time using hot water and giving it enough time to cool. Unlike wallpaper paste, wall size should be a very thin mixture and much runnier. Once you've created the size, apply a thin coat all over your walls with a brush or a roller.
2.) Prepare the Paste
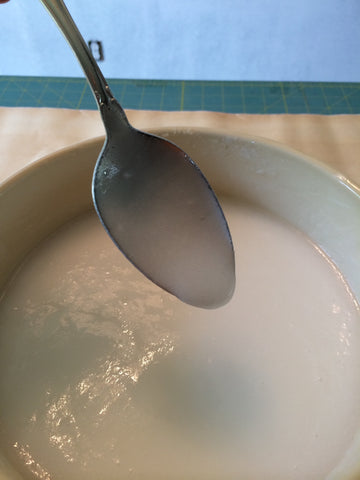
For vintage paper (not vinyl) always use a traditional wheat paste that is labeled "for hanging paper". Mix the paste according to package directions. Prepare it ahead of time with hot water and let it cool.
The paste should be a thick liquid, but not lumpy. Keep in mind the thickness of your paper: the thicker the paper, the thicker the paste, and vice versa.
3.) Set a Vertical Plump Line
After letting the size dry for a few minutes, it's time to mark a straight line from ceiling to floor in the place where you want to start hanging the paper. Paperhangers traditionally used a plumb bob to mark a straight vertical line, but we prefer the handiness and efficiency of a laser level, which can be easily reset to align each new piece as you hang it.
Measure a distance about 1/2 inch less than the width of your pattern away from the corner where you want to start (for example, measure 17.5 inches if your pattern is 18 inches wide). Mark a vertical line that reaches from the floor to the ceiling.
You will hang your first strip of wallpaper on the far side of this line (leaving almost a full pattern's width gap between the corner and the wallpaper). You should not start the first strip exactly in the corner because corners are often not straight. It will be better to wrap around the corner in the end than use it as your starting point.
4.) Determine if your pattern is a Straight or Drop pattern
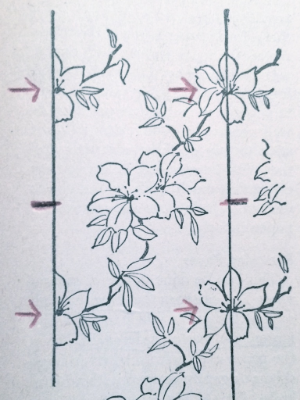
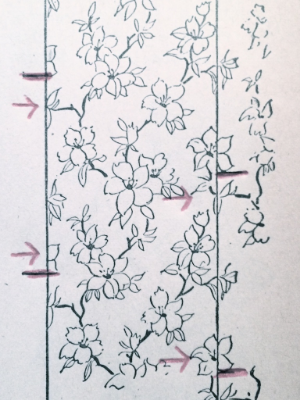
On a straight pattern, the design on the left-hand side will exactly line up with and complete the design on the right hand side.

With straight patterns, you can go ahead and cut the correct number of strips for the wall (determine the number of strips by dividing the wall's length by the width of the paper, not including the selvage edges). Make sure to cut each strip 6 inches longer than the height of the wall. These extra inches will give you 3 inches on top and bottom allowing you to maneuver the paper for correct matching.
We only recommenced pre-cutting one wall's worth of straight-patterned wallpaper in order to leave room for humans error. Vintage Wallpaper is in limited stock and we like to leave room for necessary adjustment and adaptation.
If you have a drop pattern, the left side and the right side do not line up exactly. Instead, the pattern descends at an angle, giving a staggered appearance to the design.
Drop patterns require adjusting. You will have to move the adjacent strip up or down in order to match the pattern to the previous strip. When cutting a drop pattern, it's easiest to cut and hang one piece at a time. After you have one strip on the wall, you can easily see where the pattern on the next piece should begin in order to match. You may lose a foot or two of paper as you adjust for matching, but any large scraps you have left over are good to keep for future repairs or touch-ups.
When you determine where the pattern on the next piece should begin, be sure to actually cut the wallpaper three inches above that point and three inches below the length to the baseboard. The extra six inches of paper are even more necessary with drop patterns
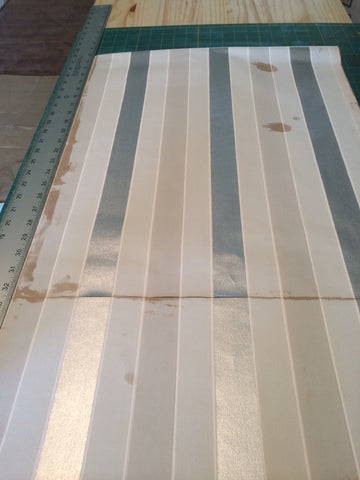
5.) Cut the First Strip
Measure a length of wallpaper that is 6 inches longer than the height of your wall. This will give you an extra 3 inches at the ceiling and 3 inches at the floor to work with as you adjust the pattern.
Using the short straight edge, cut across the wallpaper to create your first strip.
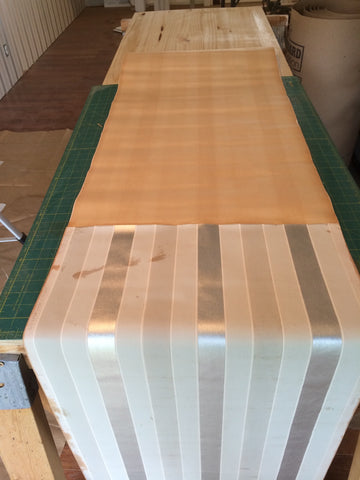
6.) Apply the Paste
Turn the strip of wallpaper print-side-down on the table, aligning the bottom "floor end" with the edge of the table nearest you and letting the top "ceiling end" of the paper drape over the opposite edge of the table. Always orient each new piece the same way on the table for correct trimming and hanging.
Using the pasting brush, spread paste evenly over the paper. Cover the paper edge to edge. Be generous so that no part of the paper is left unpasted or underpasted, but don't be too excessive. You don't want to apply such a thick layer of paste that it will weigh down the paper and squish out in all directions when pressed to the wall.
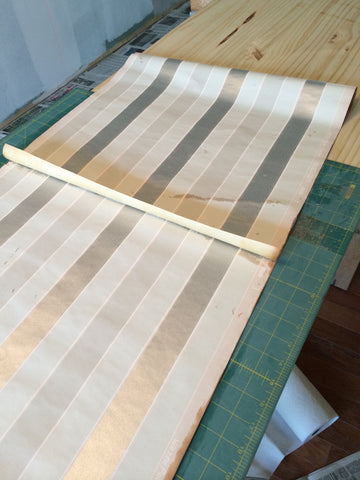
Once you've applied the paste to this first section of the paper, you will fold this pasted section in upon itself. Take the pasted end and fold it in half over the rest of the pasted portion on the table. Carefully align the selvage edges on the left and right. You should now have approximately 2/3 of the whole strip folded so that the printed pattern shows on the table while 1/3 of the whole strip should still be print-side-down and ready for pasting. You must match the edges correctly as you fold it so that when you trim the selvage edge in the next step, your trimming will be straight. Gently press the paper together just enough so that it stays, but do not crease it.
Pull the remaining unpasted portion of the wallpaper onto the table so that it is now in the working area. Paste the rest of the paper. Fold this strip in on itself as well, overlapping the already folded piece by an inch or so. Make sure the edges are aligned and the selvage edges match on the overlapping portion.
7.) Trim Selvage Edges
The easiest way to trim and hang wallpaper is using the lapping method. In the lapping method, you must trim just one selvage edge from the paper. When you hang each new piece on the wall, the trimmed edge will overlap the previous piece's remaining selvage edge. This method better disguises slightly crooked trim lines because the background of the selvage edge will camouflage any potential gaps. Lapping does create slightly raised seams, but with thin or average papers, the seams blend into the wall nicely. Lapping was also the most common method used by mid-century women, so it's authentic to the paper's era.
When lapping, always trim the same selvage edge on each strip. Most people naturally work from left to right when hanging wallpaper, which means that you will likely need to trim the left selvage edge. In some cases, you may choose to work from right to left and will need to trim the right-hand side of each strip. Whatever you do, just be consistent.
To trim the paper, align your long straightedge with the selvage edge. Using your rotary cutter, follow the length of your straightedge and trim off the selvage edge on one side. If you lined up the paper correctly when folding it, the edge should trim straight. Note that the final strip to be hung in the room will need to be trimmed of both selvage edges.
Please note: Some wallpaper patterns available on our website do not have selvage edges. You would use the "butting" method instead of "lapping", touching the seams together as close as possible instead of layering the edges. We inspect all of our papers to determine that they are in good shape for their age, but these papers are all still very old. With papers that have already been trimmed of selvage edges, the seams where they meet may have become slightly discolored with time, causing the seams to darker and more noticeable when hung.
8.) Hang the Wallpaper
Take your vintage wallpaper strip in hand by holding the "ceiling end" which should be the smaller of the folded portions. Climb the ladder and carefully separate the top folded section. Apply the paper to the wall (to the right of the plumb line) with an extra 3 inches of wallpaper sticking out beyond the ceiling. Ceiling lines are rarely straight, so it's better to trim the paper to match the ceiling line than to butt the wallpaper right into the edge.
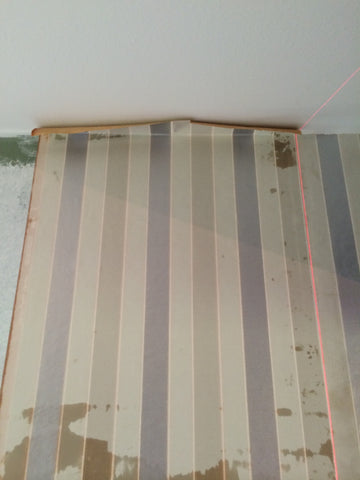
(In our specific room, it worked better to move from right to left, which is why the paper is actually to the left of the plumb line. The instructions proceed as if you are hanging paper to the right.)
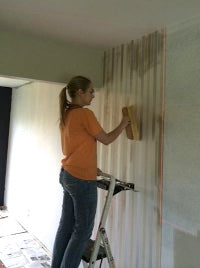
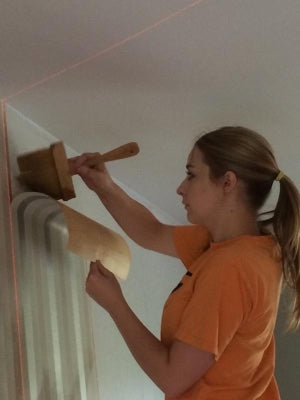
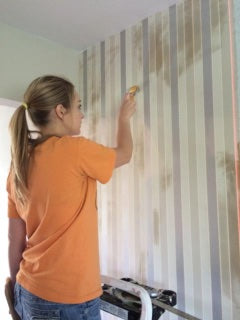
Align the left edge of the paper with the vertical plumb line. Press the paper to the wall and gently smooth with the smoothing brush. Do not stretch or force the paper when smoothing or it may tear. Gently brush the paper from the center to the outer edges to get rid of air bubbles.
Once the top portion is in place, climb down from the ladder and reach behind the hanging paper to separate the remaining folded section. Align this section with the plumb line, press it to the wall, and brush smooth. You should have approximately 3 inches of paper hanging below the baseboard.

If you need to adjust the paper, gently remove a few feet of wallpaper and realign. You may also carefully shift it into place by pushing and maneuvering the paper slowly with your hands. If in the process the paper starts to lose its stickiness, apply a small amount of fresh paste to the back of the paper or onto the wall.
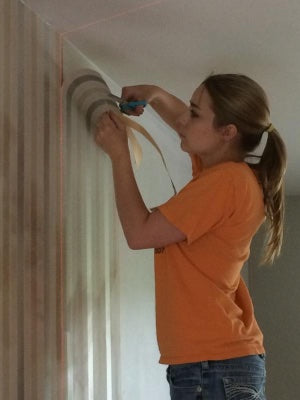
9.) Trim Paper along Ceiling and Baseboard
When the strip of wallpaper is in place, climb up the ladder again with scissors in hand. Lightly run the back of the scissors along the ceiling edge to crease the paper for trimming. (Do not use the sharp side or the paper will tear.) Once you've marked the ceiling edge, pull a few inches of the paper away from the wall and cut along the marked line with your scissors. Then smooth the paper back into place. Do the same to the bottom.
10.) Hang the Following Strips
To cut the next strip of paper, take note of where the pattern begins on the first strip and where you need the pattern on the next strip to begin in order to match them together. Measure out enough paper to cover the length of the wall, making sure you've accounted for the necessary pattern matching and factored in 3 extra inches above that and 3 inches below the floorboard. If you have a large drop pattern, you will lose a significant amount of paper between pieces for matching.
Paste and trim the next strip. Hang it to the right of the previous piece, overlapping the trimmed side over the previous piece's selvage edge. You will be overlapping approximately 1/4 to 3/4 inch. Use a seam roller to gently press the seam flat.
(If your paper does not have any selvage edges, do not overlap. Instead, carefully maneuver the two edges together to be as flush as possible.)
11. ) Continue Papering Around the Room
As you work, gently brush away or wipe off any paste that gets on the front of the wallpaper. This may temporarily darken the paper, but it will dry just fine.
(As long as the wallpaper is "colorfast," you can gently brush it with a damp cloth without removing or smearing any color. All papers printed in the 1940's and later decades are colorfast. With papers that are from the 1930's or earlier, you may want to apply a spray matt fixative on the front of the paper before hanging it. You should also be more careful about not getting paste on the front of these papers.)
CORNERS: When you reach a corner, you must bisect the width of the wallpaper piece and hang it in two separate parts. Before hanging the piece that hits the corner, measure the distance from the last hung wallpaper strip to the corner. Trim your corner piece so that its width is only one inch greater than that distance. Hang this piece, gently pressing the paper into the corner. Mark a new vertical plum line to the right of the corner, and hang the second half of the corner piece, butting it into the corner and aligning it with the vertical plumb line.
The rest of the wallpaper strips are hung in the same manner. As you work, clean off any paste that gets on the woodwork, ceiling, or floor as well.
Hanging wallpaper from the 1970s? Consult these tips on hanging vinyls, flocks, metallics, and mylars.